How to Successfully Migrate Your Website to Framer

Introduction
Framer is making waves in the no-code space, with more websites being built on it each day.
But if you’re rebuilding a client’s existing site on Framer, there’s an important factor to consider:
SEO. A well-established existing site likely has a lot of valuable SEO energy—page rankings, backlinks, and domain authority—that are driving lots of traffic to the site.
An effective website migration ensures that this SEO energy is transferred across to the new site. A poorly executed migration can lead to massive traffic loss and, in extreme cases, even kill the domain (like in the screenshot)
In this guide, we’ll walk through the essential steps to ensure your Framer migration retains (or even improves) traffic, SEO, and user experience.

When Is A Website Migration Needed?
A website migration involves transferring content, structure, and functionality from one platform to another. That means that any website that is currently live and ranking that you are rebuilding in Framer will require a migration.
Here's how you might find yourself doing a website migration:
Client: "Hey there! I want to make my website look better!"
You: "We can definitely improve it, especially if we build it in Framer! Where is your website currently hosted?"
Client: "The current site is on WordPress / Webflow / Wix / Squarespace / any other CMS. Is that a problem?"
Here's the time to showcase your expertise about migrations, put your clients mind at ease and build the migration service into the quote.
❌ You (wrong answer): "Ummm, it shouldn't be!"
✅ You (correct answer): "Fantastic, no problem at all. We will do an audit of your current site to see which pages are ranking and have backlinks. We'll also migrate all content still relevant across and setup 301-redirects to handle make sure all the links go to the right places."
The correct answer builds trust with the client and enables you to charge for the migration services.
Client: "Great, so we will keep our rankings and all that? If so, let's proceed"
You: "Yes exactly. Full transparency, there can be some drop off in the short term but that is part of the process. I'll run the scan and get back to you with a proposal".
Read out complete guide and download the checklist to help you run your SEO website migration.
Now that you have landed the job, let's dive into the specifics and see the process to getting the content across and setting up the redirects.
Migration Process Overview
Here are the key steps to ensures your website migration is as smooth while minimising SEO impact:
- Run the scans to find pages that must be rebuilt (You can use Rapid301's FREE tool for this)
- Identify the key pages that must be rebuilt/migrated across.
- Export Content from the Old Site
- Build the New Site in Framer
- Add and Optimise Content
- Set Up 301 Redirects
- Go Live
- Monitor Performance and Fix Issues
Steps 1 & 2: Finding Pages That Must Be Rebuilt
There are a number of tools to use to see which pages need to be rebuilt, but the metrics you will use are often the same. Page authority, backlinks, number of people landing on that page:
Here are some tools that you can use, both free and paid.
- Google Search Console: A tool to see which pages are driving the most traffic (free)
- ScreamingFrog: Crawl your site and assess the importance of each URL. (free for 500 pages)
- Semrush: A powerful SEO tool that provides comprehensive insights into your website’s performance, including backlink profiles, keyword rankings, and site audits. (paid)
- Neil Patel’s UberSuggest: UberSuggest is a more user-friendly and budget-friendly alternative that offers backlink analysis, keyword suggestions, and competitor research (paid)
- Ahrefs Webmaster Tools: Offer basic insights into backlinks and site performance without requiring a paid subscription (free or paid)
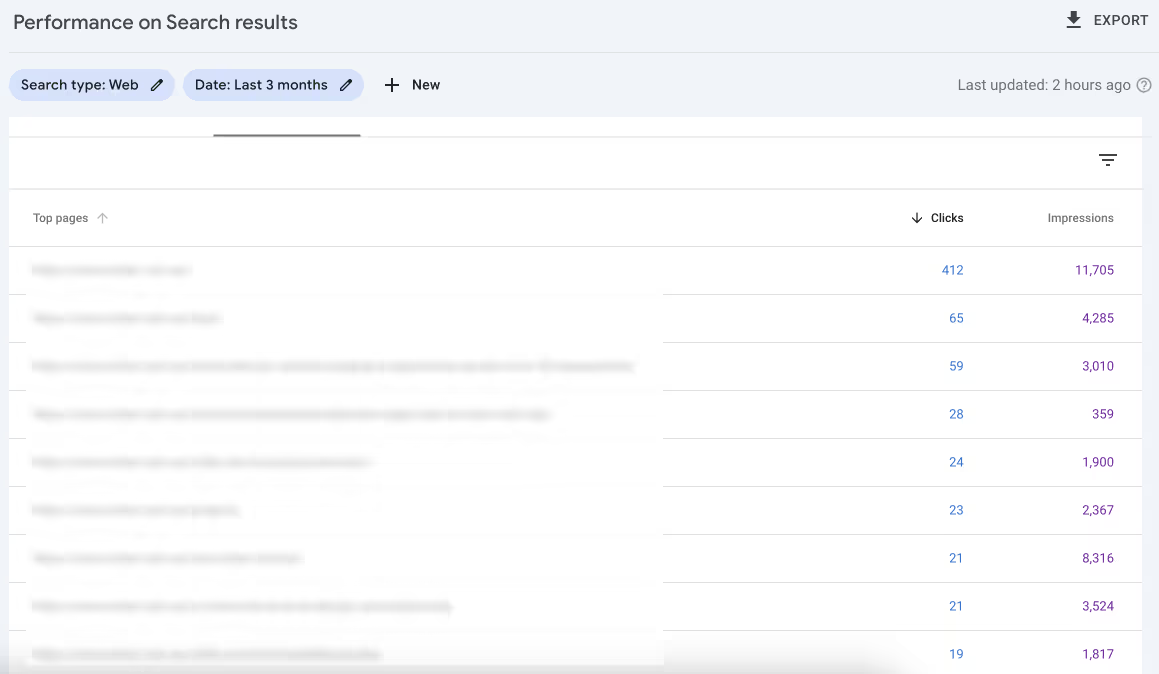
The outputs will show you which pages are responsible for receiving most traffic on the site. These absolutely must be rebuild and have content that targets the same keywords (more on that later).
Step 3: Export Content From Old Site
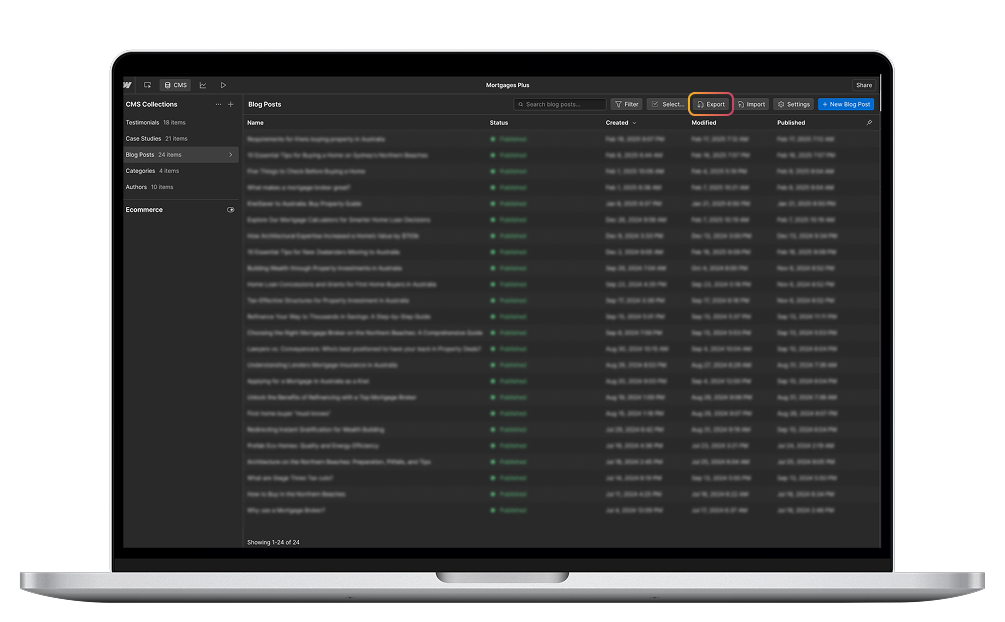
Time to extract all the CMS content from the old site. Exactly you extract content depends on the platform you’re migrating from, but typically you can download CSV files from them.
- WordPress: Use the native export feature (Tools -> Export -> Export All Content). This generates an XML file, which can be converted to CSV for easier handling.
- Webflow, Wix, Squarespace: Go to the CMS collections and click on the button that says something like Export CSV files.
Understand the structure of the CMS outputs from the old site as this will impact the new CMS structure you setup in frame.
Step 4: Setup The Project in Framer & Build
Now it's time to build the new site in Framer.
For a successful migration, you have to build all the key pages that have page authority, backlinks or are the first page people land on when visiting your site.
It's good practice to build the mission critical pages first.
- Static pages like Home, About, Contact.
- CMS / Dynamic pages such as Blogs, Projects, Team Members.
I tend to build Static pages first and then configure the CMS in this step - reference the existing structure so that you can enjoy streamlined imports.
Framer also has this handy HTML to Framer browser extension that let's you import elements from the old site directly into Framer.
Choose Page Paths / Names
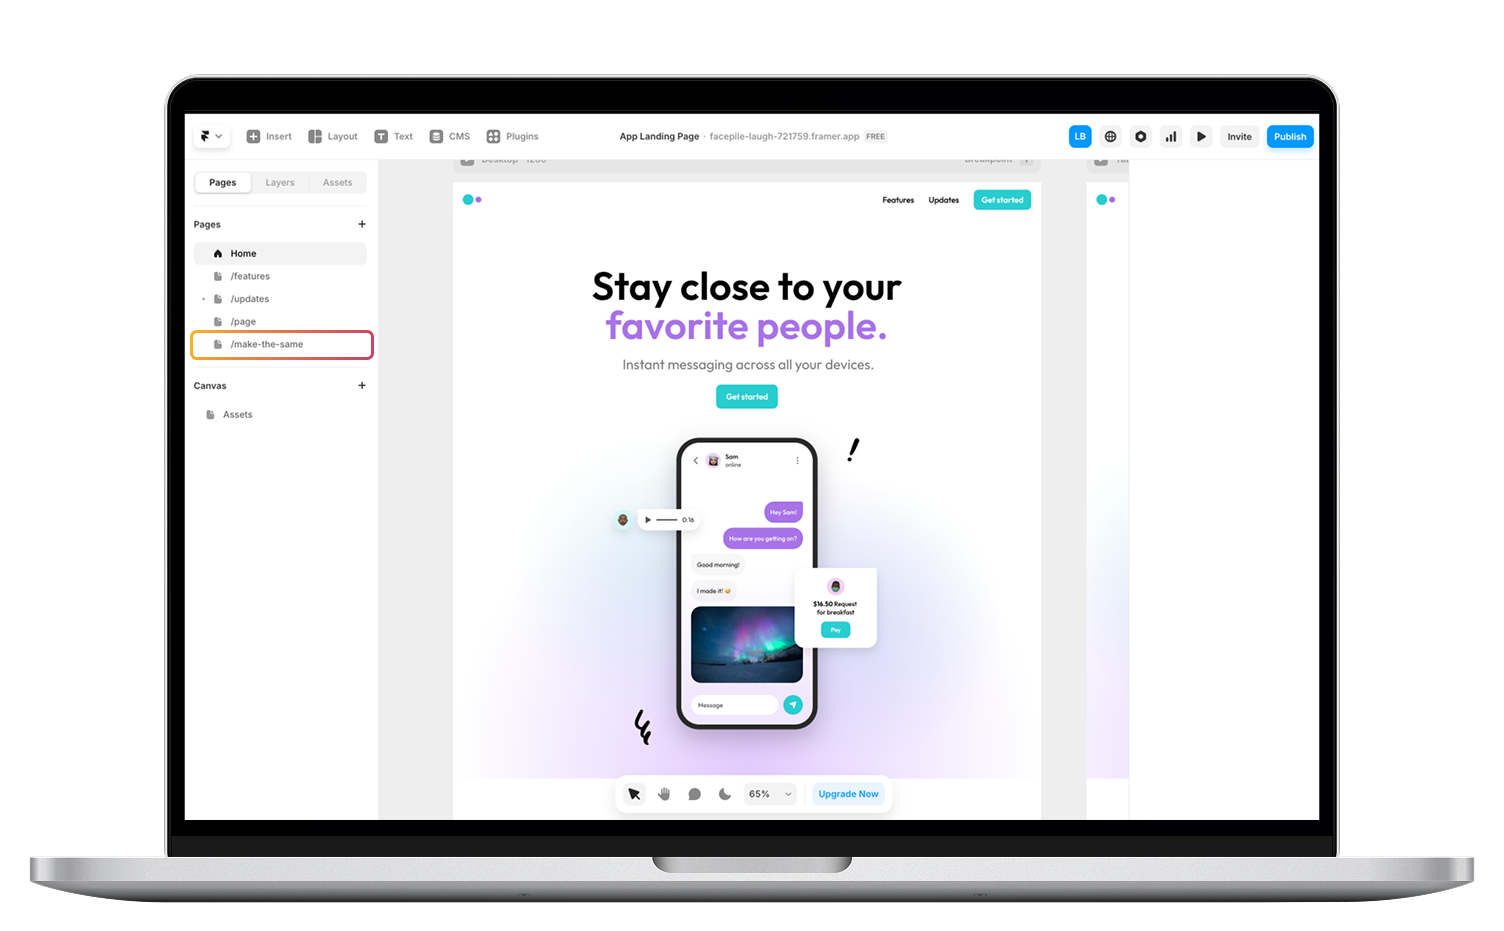
It is critically important to consider the new URL / path structure. You have one of two choices.
- Keep the page/URL structure the same - best approach, no redirects are needed.
- Change the page/URL structure - acceptable, must 301-redirect for the page.
Remember, while you work to improve the usability and design of the site, leave enough space for content so you can keep all relevant keywords.
Step 5: Add and Optimise Content
Now that the front-end is built it's time to add and optimise the content.
You may already have some of this as part of Step 4 but it's worth it's own step because there are some key points worth mentioning.
Migrating Content
- Static Pages: Copy and refine text, images, and formatting.
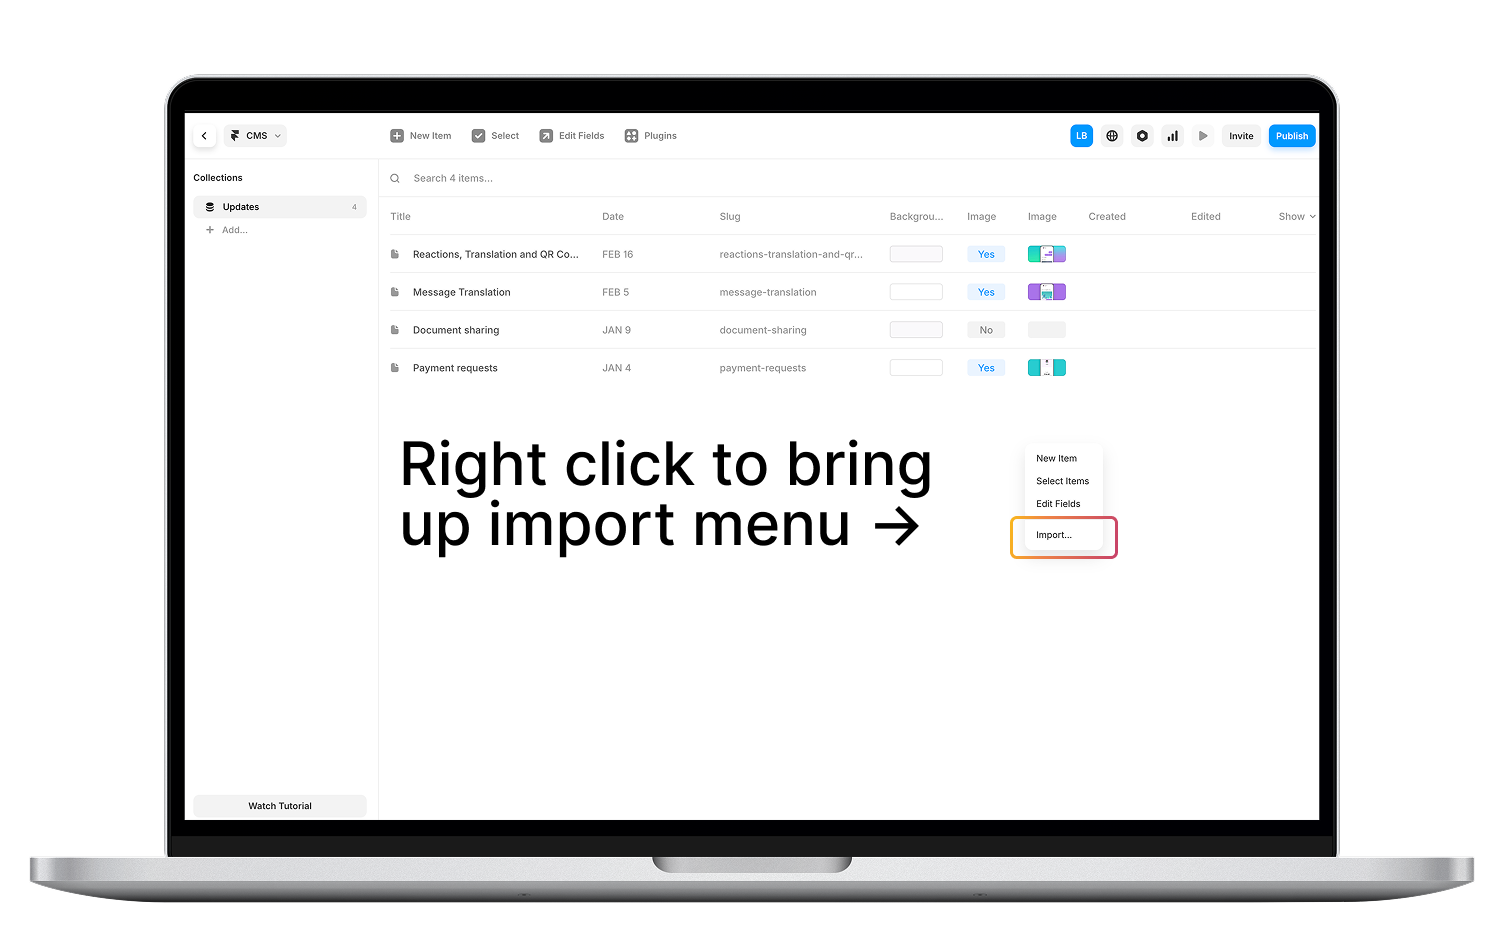
- CMS-driven Content: Use Framer’s bulk import feature to streamline the process.
Ensure that you do not cut out a lot of text that might contain keywords that are ranking! Important considers for SEO to reiterate.
- Preserve important keywords that contribute to rankings.
- Add metadata: titles, descriptions, and Open Graph (OG) images.
- Keep URLs the same if possible to reduce the need for redirects.
Step 5: Pre Launch - Set Up 301 Redirects
Once you have rebuilt all the pages and migrated all content across, it's time to setup the 301-redirects - an essential step for preserving SEO rankings.
If your URLs change, set up 301 redirects to point old URLs to their corresponding new pages. Why is this needed?
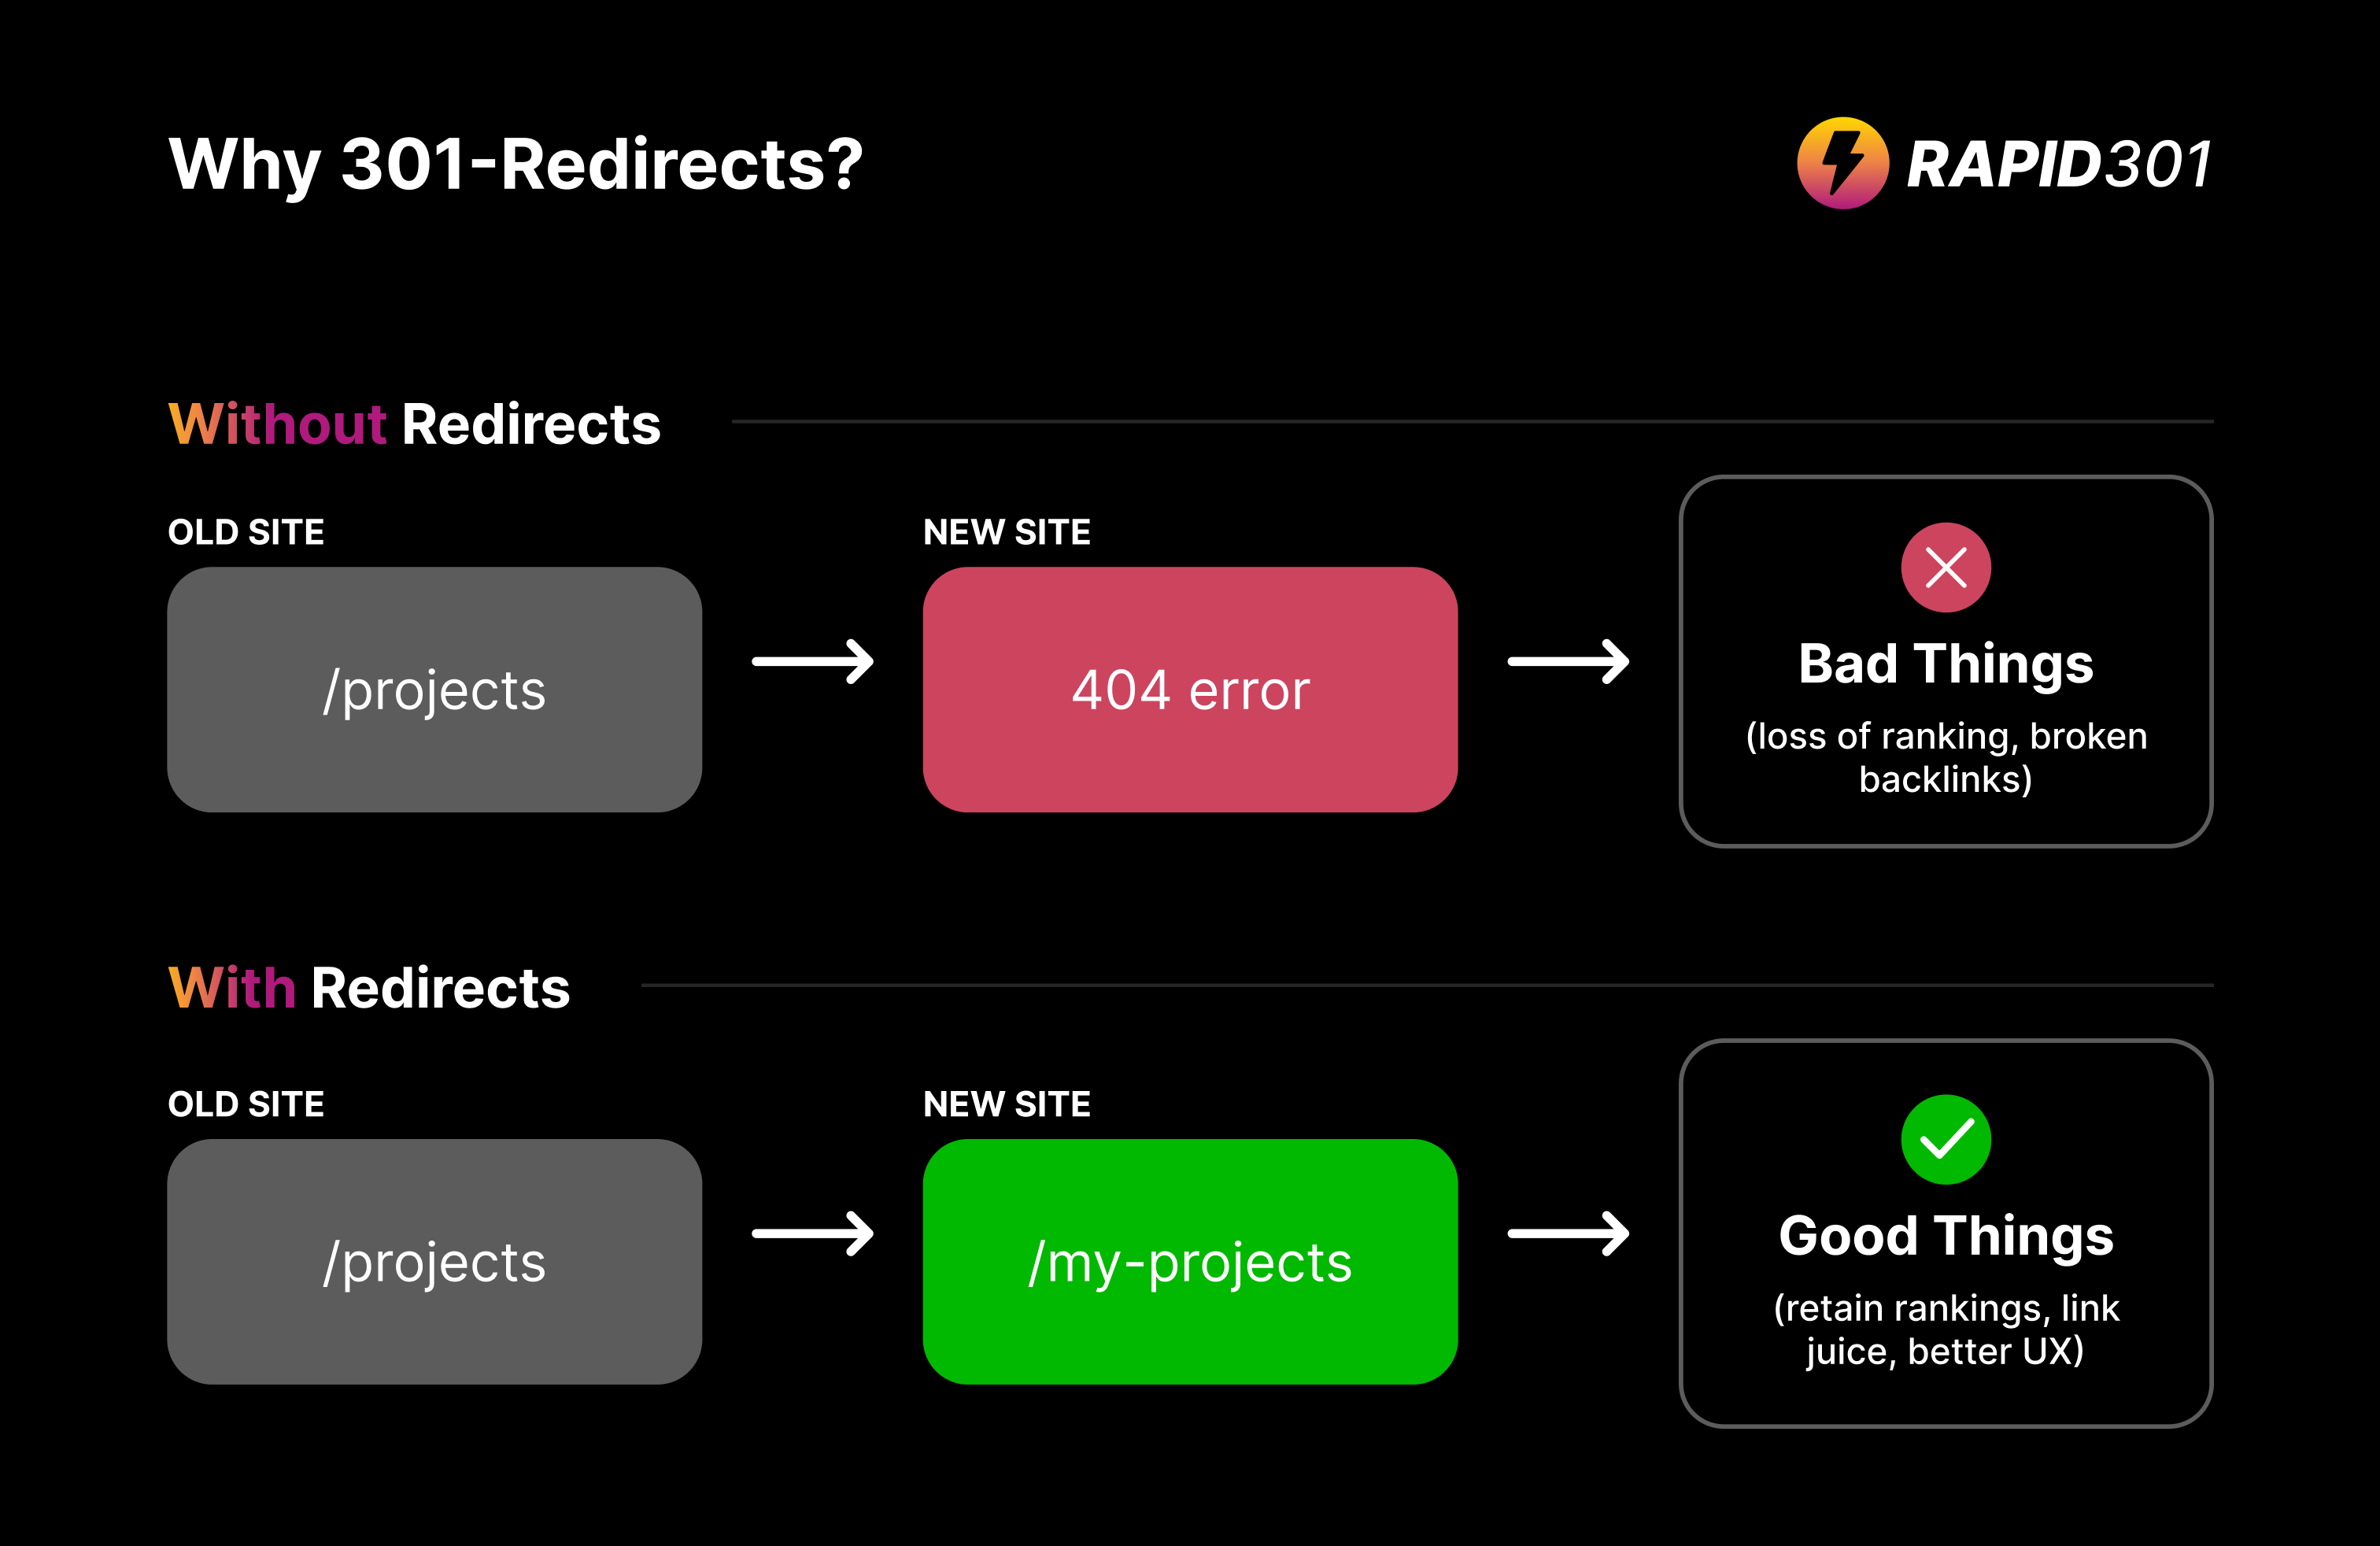
When someone tries to access a page that existed on the old site but does not exist on the new site, the 301-redirect will send them to the correct place. Without a redirect, they end up at a 404 (bad news!)
The 301-redirect tells the server which relevant page/path on the new site is the best match for the page/path on the old site that don't exist anymore.
You can create the 301-redirects manually (like we used to) or use Rapid301 to automate this process.
Manual Process (takes hours/days)
- Make sure Framer is generating the sitemap, publish the Framer site and get all the URLs.
- Get the sitemap from the current, live website site.
- Manually map the OLD URL and NEW URL's in a spreadsheet software.
Rapid301 Process (takes seconds/minutes)
- Add the current site URL (the live old website) and staging site URL to Rapid301's URL -> 301-redirect tool.
- Review the mappings and export.
Alternatively, if you have the sitemaps from Screaming Frog or another SEO tool, you can use the Sitemap -> 301-redirect tool.
The last step is to upload the 301-redirects to Framer.
- Enterprise Framer Users: Can bulk upload redirects.
- Standard Framer Users: Must enter redirects manually in the project settings.
- Rapid301 Plugin (coming soon): Will automate this process via the Framer API.

Step 6: Go Live
With all the heavy stuff out of the way, now it's time to launch! But first, complete your pre launch checklist and make sure it's tested across all devices.
The last few steps in this step are the same for rebuilds or new sites.
- Connect the domain in Framer’s settings.
- Verify the site in Google Search Console & Bing Webmaster Tools
- Submit the sitemap to Google.
- Set up a global canonical tag.
- Install tracking tools like Google Analytics or Plausible.
Step 7: Post-Migration Monitoring
Because we have changed the structure, it's very important to monitor migration carefully for the first 72 hours. You can perform spot fixes if you notice anything funky.
- Monitor Google Search Console for indexing issues.
- Ensure all 301 redirects function correctly.
- Track traffic and rankings for any sudden drops.
- Fix broken links or redirect issues promptly.
Conclusion
Migrating to Framer is an excellent opportunity to enhance your site’s design and performance.
By following the approach in this article, you can ensure that your content is migrated across efficiently, your rankings remain intact and you get paid for the additional work!
Don't forget to download the free Website Migration Checklist.
