The Ultimate Guide to 301-Redirects in 2025
Introduction
When rebuilding or migrating a website, one of the most important but often overlooked tasks is setting up 301-redirects. So what are 301-redirects and why are they important?
Every link on the current site has a certain amount of "link juice" which has been earned as a result of hard-work in SEO, building backlinks etc.
Don't want to read? Watch the video
Need to generate 1000s of redirects in seconds? Try Rapid301 now →
Links with large amounts of "link juice" are responsible for driving traffic to your site. It's critically important that we keep this "link juice" flowing to keep Search Engines happy and prevent loss of traffic to our site. 301-redirects (permanent redirects) are what do this.
This guide will take you through a step-by-step process of identifying key pages, creating your redirect document, and streamlining the entire process.

Why 301-Redirects Matter
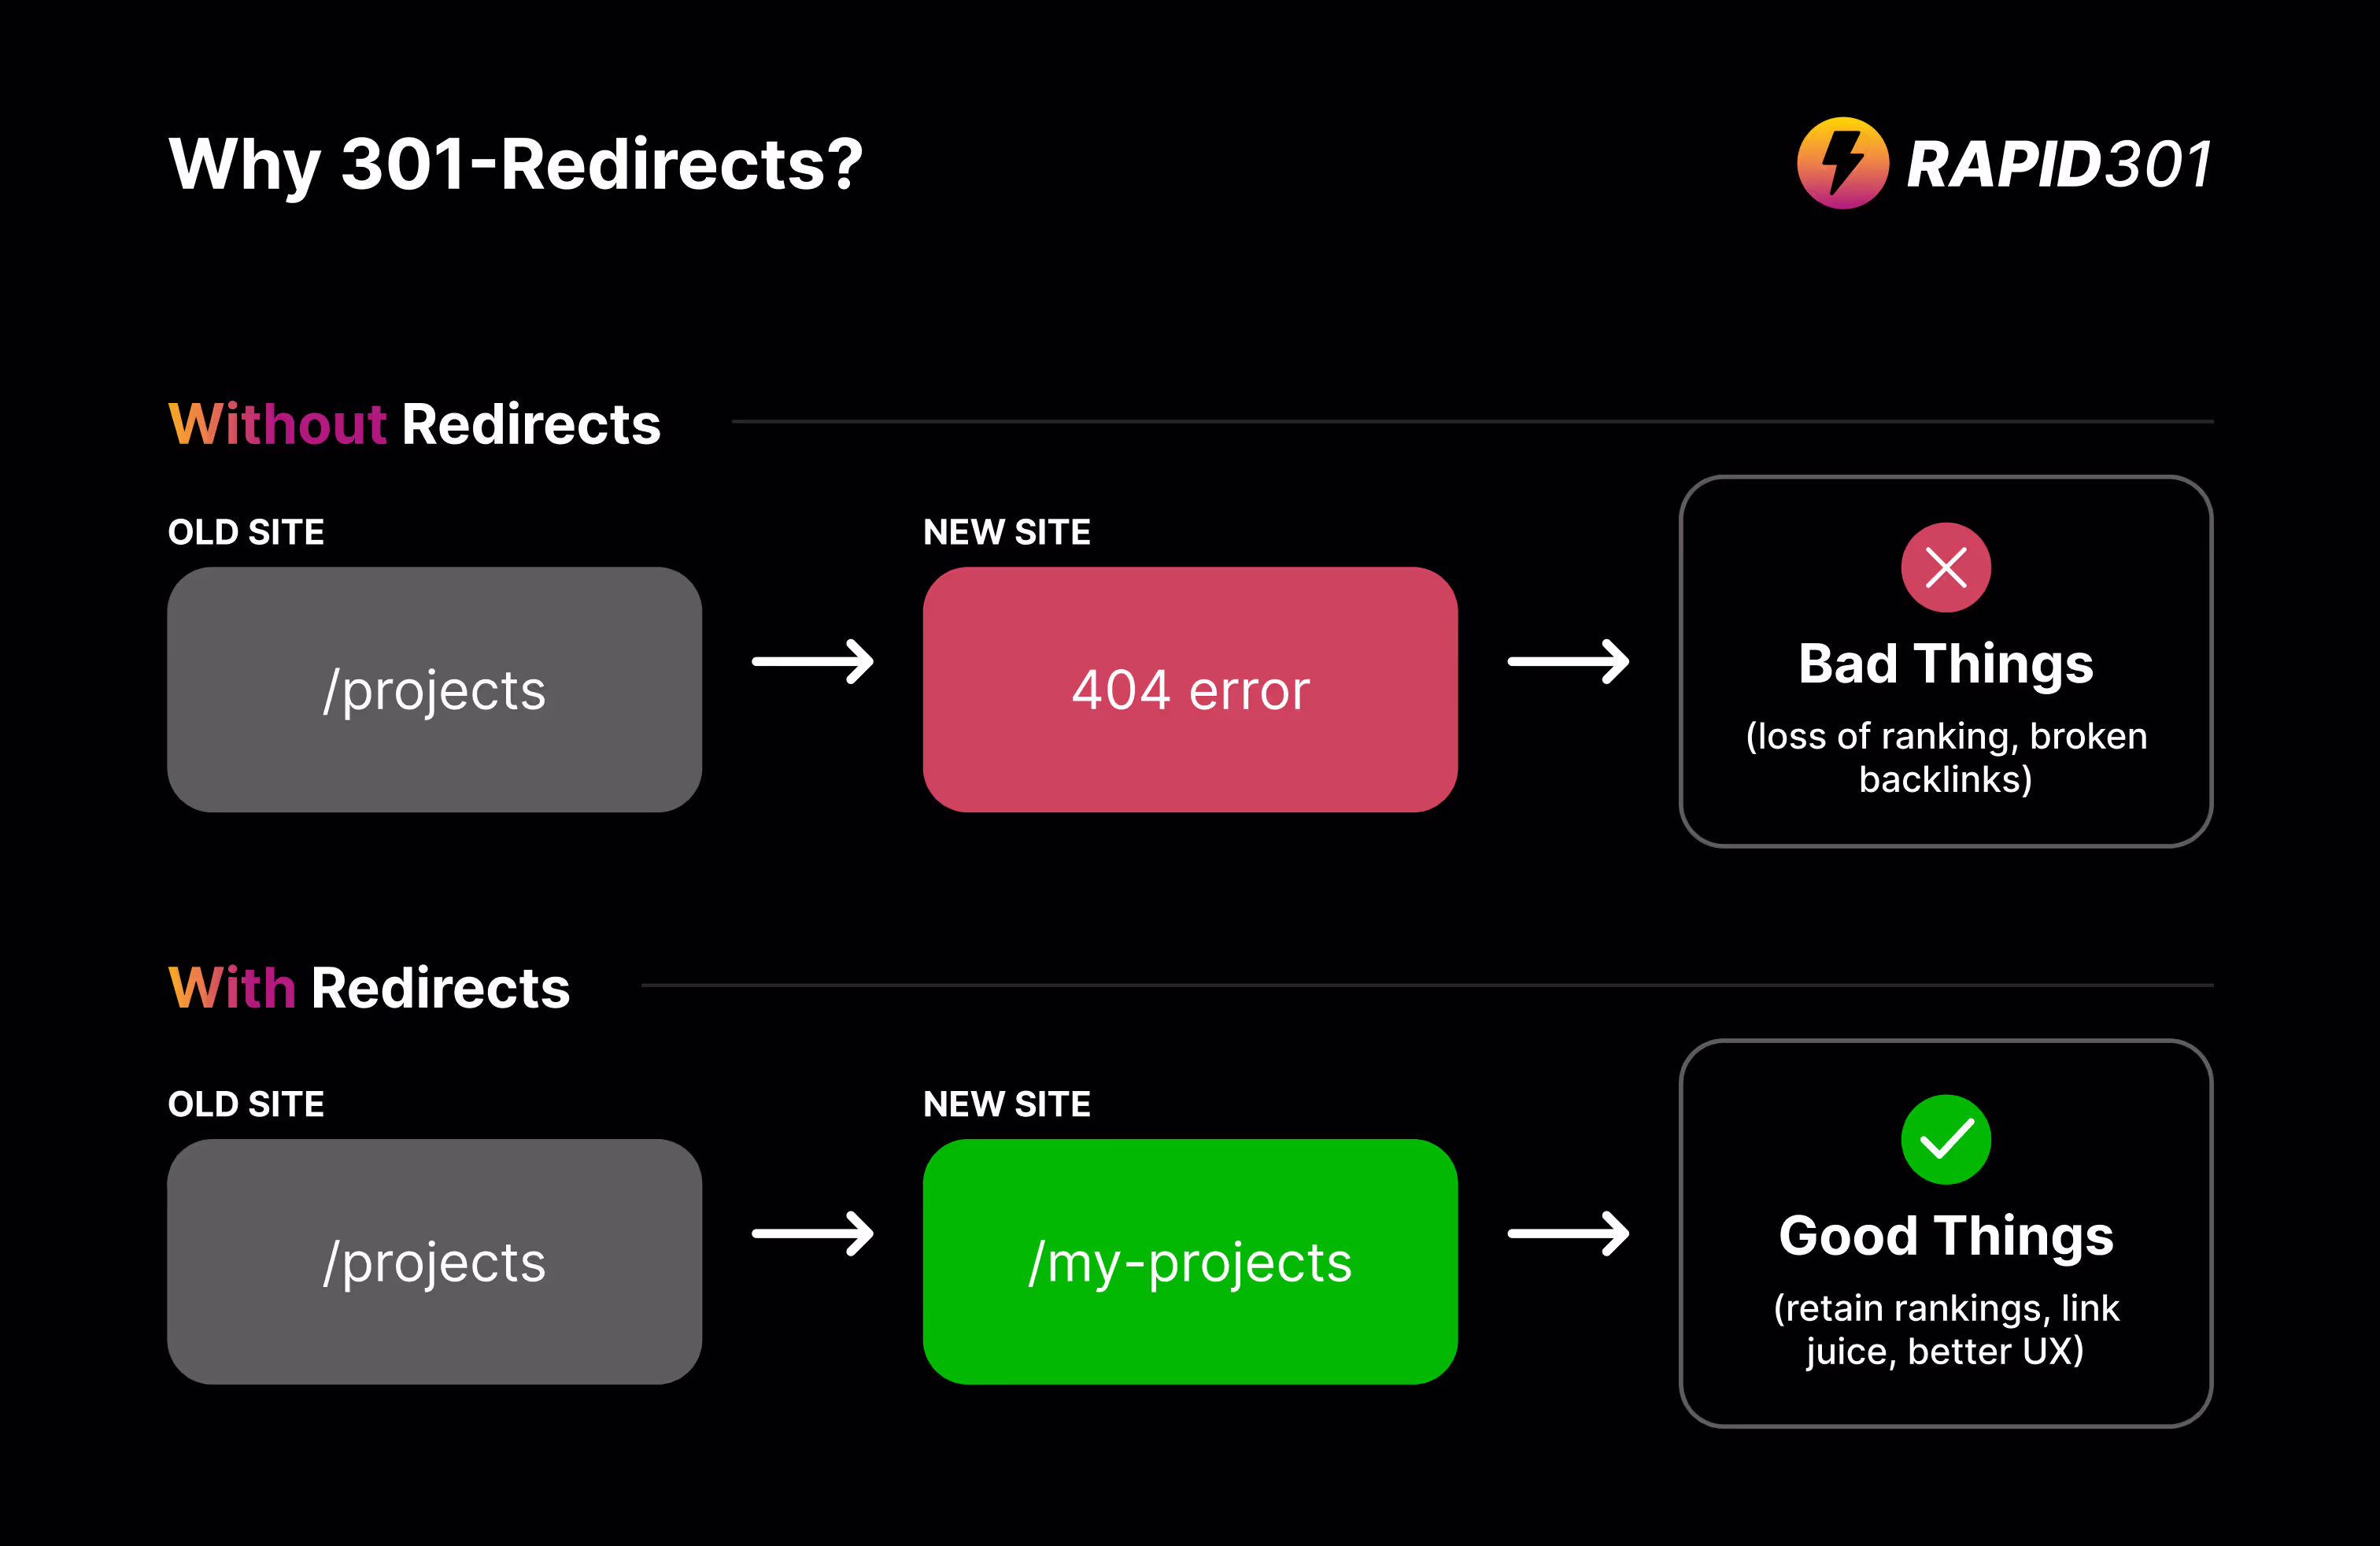
301-redirects tell search engines that a page has permanently moved to a new location, ensuring that the authority and backlinks of the old URL transfer to the new one.
If the URL has changed and no 301-redirect has been setup, users will end up at a 404 page and bad things will happen.
Your site will have broken links, see a loss in traffic, and a decline in your site's SEO performance - your overall site authority can take a big hit.
To prevent this, each URL on the old site must have a corresponding page or 301-redirect setup on the new site.
(imagine doing this manually for sites with 100's or 1000's of pages!)
The 301-Redirect Process
Here’s a quick overview of how to approach creating your 301-redirect plan:
- Identify pages with authority and backlinks: Focus on high-traffic, high-authority pages.
- Rebuild those key pages: Make sure these pages are a priority in your site rebuild.
- Create a redirect document: Map out the old URLs to their new counterparts to maintain a smooth transition.
Need to generate 1000s of redirects in seconds? Try Rapid301 now →
How to Identify Pages That Need to Be Rebuilt
To determine which pages to prioritise, use these tools to analyse page authority and backlinks:
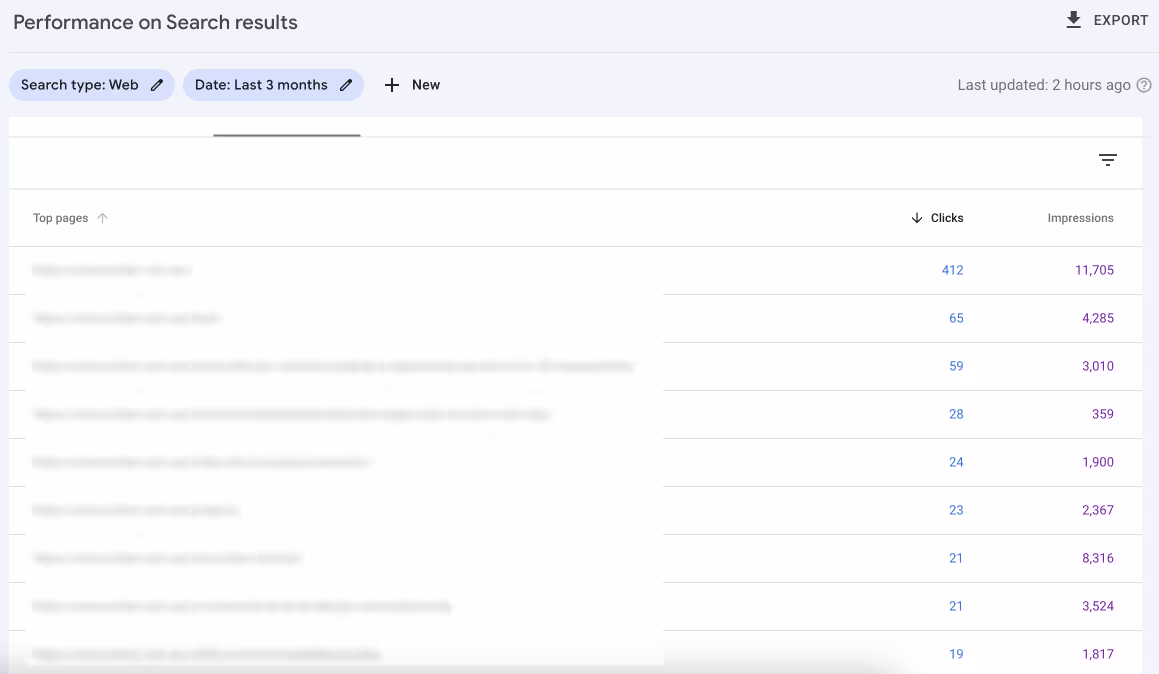
- Google Search Console: A tool to see which pages are driving the most traffic (free)
- ScreamingFrog: Crawl your site and assess the importance of each URL. (free for 500 pages)
- Semrush: Semrush is a powerful SEO tool that provides comprehensive insights into your website’s performance, including backlink profiles, keyword rankings, and site audits. (paid)
- Neil Patel’s UberSuggest: UberSuggest is a more user-friendly and budget-friendly alternative that offers backlink analysis, keyword suggestions, and competitor research (paid)
- Ahrefs Webmaster Tools: Offer basic insights into backlinks and site performance without requiring a paid subscription (free or paid)
Considerations for Changing Site URL Structure
When rebuilding, it’s always a good idea to keep the link structure as close to the original as possible, especially for blogs, case studies, and other content-heavy sections. This not only helps with SEO but also makes it easier for tools that can help automate the creation of 100's or 1000's or links way more accurate.
For example:
Old site: https://mydomain.com/blogs/the-best-way-to-manage-redirects
New site: https://mydomain.com/articles/the-best-way-to-manage-redirects
Note that although blogs changed to articles, the rest of the url path has been kept the same.
What If the Old Service or Content Is No Longer Available?
If a service or product is no longer offered, redirect the old URL to the most relevant or similar page on your new site. If no direct replacement exists, redirect to a resource page or your homepage to keep the traffic flowing.
For example:
Old site: https://mydomain.com/services/service-that-does-not-exist-anymore
New site: https://mydomain.com/services
Note that as the service doesn't exist, it redirects to services - not the home page.
The Traditional Approach to Creating 301-Redirects
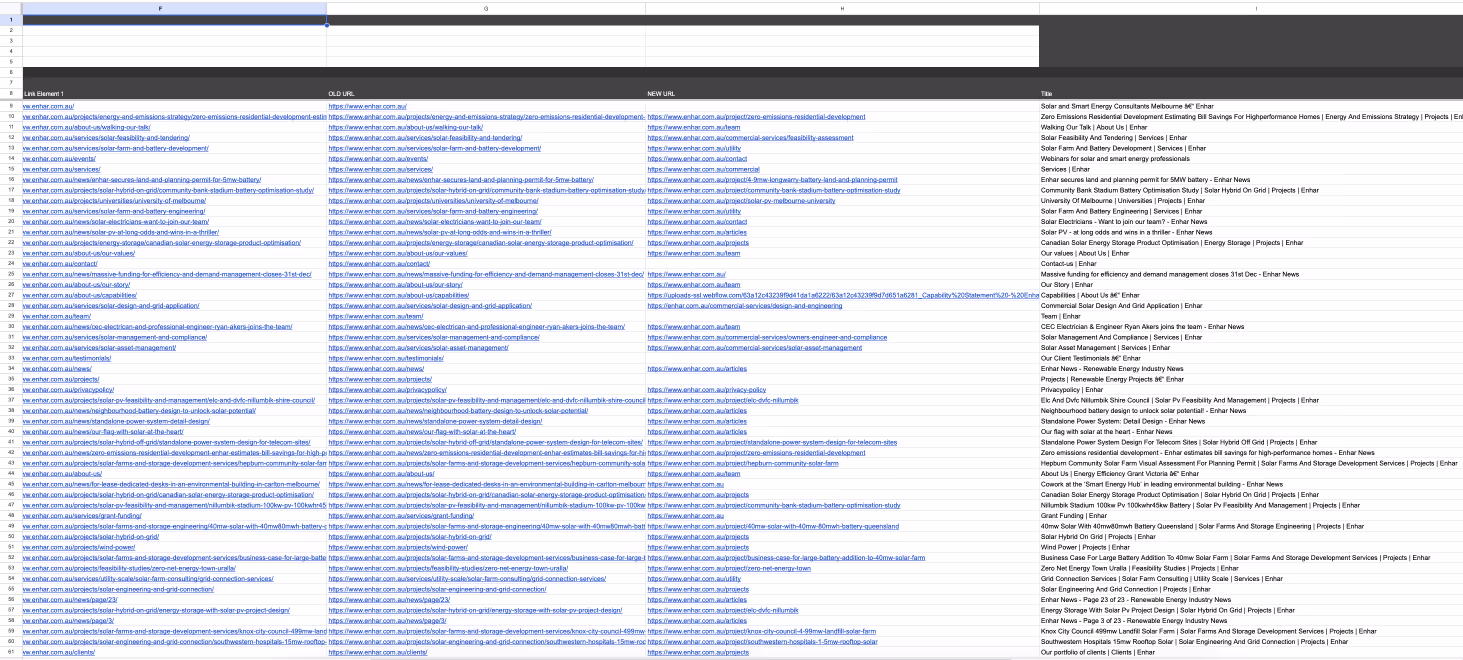
Previously, creating 301-redirects involved manually scraping the old site, identifying relevant new pages, and matching URLs one by one. This method required tools like Google Sheets and custom scripts to map out the old URLs to the new ones, and while it worked, it was a labor-intensive and error-prone process.
The Modern Solution: Rapid301
Enter Rapid301, which automates the entire process, saving you hours of manual labor.
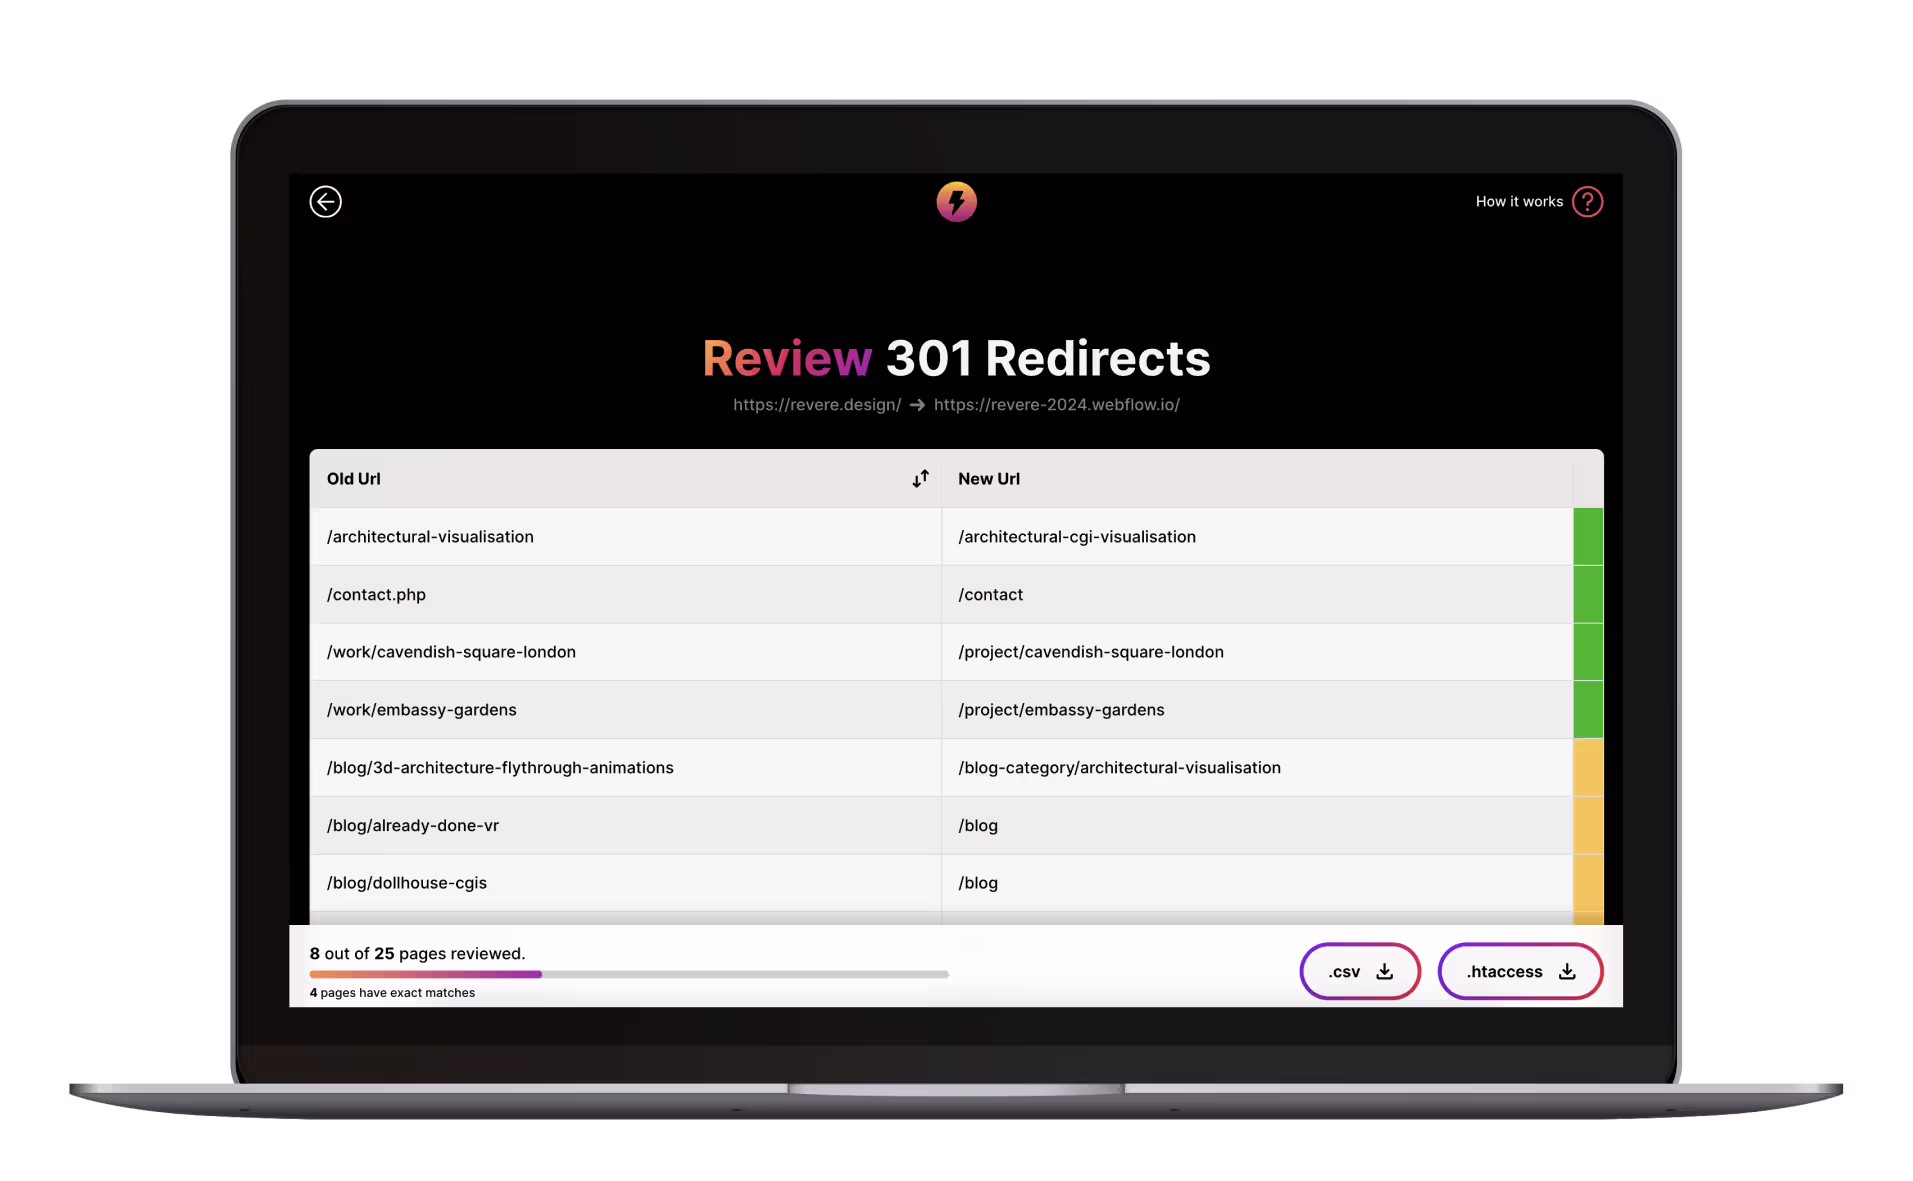
Rapid301 scrapes both the old and new sites, automatically matches the most relevant pages, and provides an easy-to-use interface where you can quickly review and adjust the redirects.
Then you can simply export the CSV file or .htaccess (more on this later) and add the redirects to the platform the new site is built on.
Need to generate 301 redirects in bulk? Try Rapid301 now →
File Types for 301-Redirects: CSV and .htaccess
When dealing with bulk redirects, different platforms use different file formats. The format you need to use will be determined by the platform you are building the new website on.
CSV Files: CSV files are simple text files used for bulk uploading data, including 301-redirects. Each line represents a record, with old and new URLs separated by commas. They're easy to manage using spreadsheet tools and are ideal for handling large numbers of redirects efficiently.
.htaccess Files: .htaccess files are configuration files used by Apache servers, commonly in WordPress. They control server behavior, including 301-redirects, through rewrite rules. Unlike CSVs, .htaccess files are more technical and allow for advanced redirection setup
Platforms and Their Preferred File Types
Here’s a quick overview of popular platforms and the file formats they support for managing 301-redirects:
- Webflow: CSV files
- WordPress (Apache-based):
.htaccessfiles - Shopify: CSV files
- Squarespace: Manual redirects (can support CSV through third-party tools)
- Wix: Internal tool for redirects (manual bulk uploads may not always be available)
301-Redirects In Webflow
If you’re handling many redirects in Webflow, consider using Finsweet’s 301-Redirect Bulk Uploader, which makes bulk uploading 301s straightforward and efficient. It’s a great way to ensure all your important pages are redirected without a hitch.
IMPORTANT: Make sure you do this before adding the custom domain / changing the DNS settings of the old site.
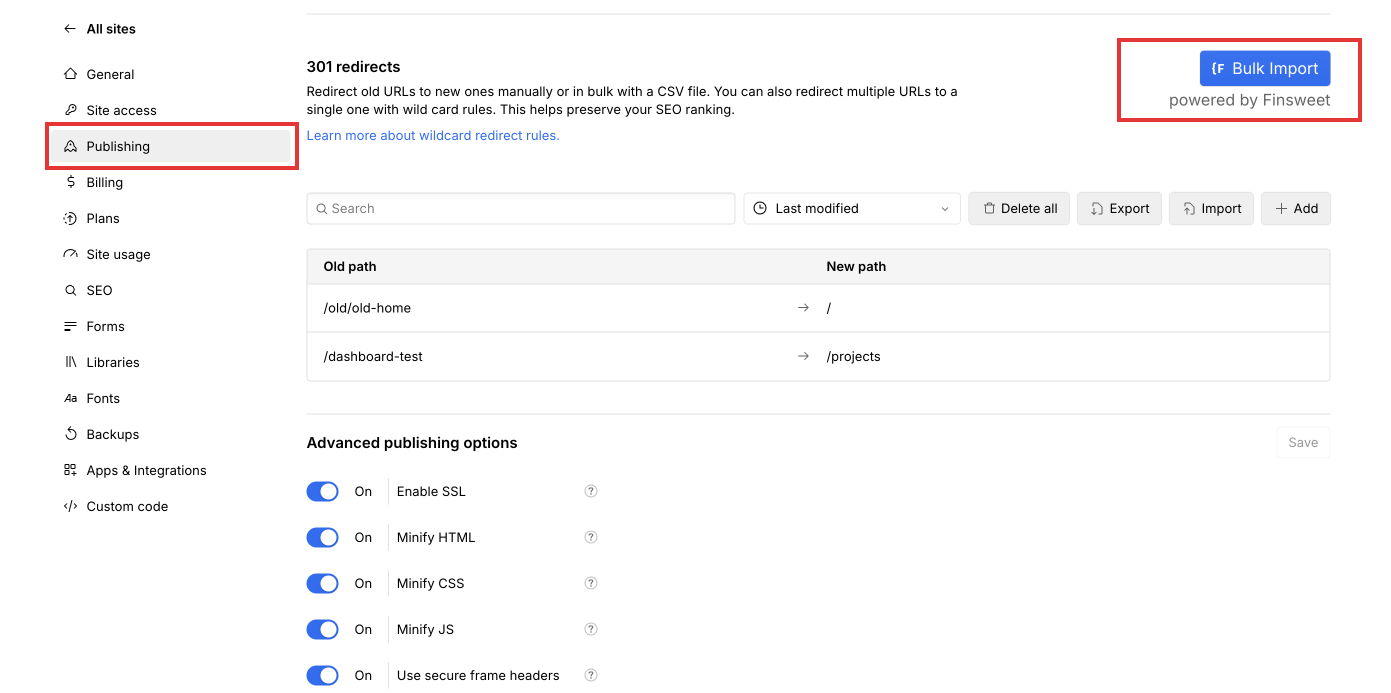
Here's the process:
- Open the project settings.
- Select Publishing.
- If you wish to use FinSweet for Bulk Upload of 301's, make sure the browser extension extension is installed and it the permissions set correctly on Webflow (the button will appear)
- Click Bulk Import
- Upload the redirect CSV file you created/exported from Rapid301.
Conclusion
301-redirects are an essential part of any site migration or rebuild, and they play a critical role in preserving your hard-earned SEO.
Using tools like Rapid301, you can automate the tedious and time-consuming aspects of process, reduce errors, and save valuable time.
If you want to ensure your redirects are setup correctly and efficiently, give Rapid301 a try today —streamline your migrations and keep your site’s SEO intact!
As a web agency owner with 15+ site rebuilds and migrations under his belt, Luke helps web development and SEO agencies improve their migration workflows through automation. Rapid301 was used internally and then opened up to the world when others asked about the idea.
